All about Tsung and Its Proxy recorder
And How the Hell Did I Get It to Work?
2019-11-22 • 8 min read
In one of the class I took in UCLA this quarter, we had to use Tsung as a load testing tool to load test our web application. We first deploy our app on AWS. Then, we obtain another AWS instance to run the Tsung test script. The problem with that set up is that debugging the test script is challenging, since we cannot change our web app to output debug information easily, and Tsung is not easy to debug as well. Therefore, I set it up locally to have it working.
Other than the difficulty of debugging, the other
challenge that I ran into is to upload an image with
Tsung. In our web application, we used multipart/form-data
to upload the image.
In this article, I will describe how I set up Tsung
on my local (macOS), and how I used tsung-recorder to work
with image upload.
- Installing Tsung
- Configuring Test XML Script
- Problem with
multipart/form-data - Tsung Proxy Recorder
- Gotchas in Test Script
Installing Tsung
We can install Tsung using homebrew.
brew install tsungThis is going to install tsung and tsung-recorder.
Then, we are good to go.
Configuring Test XML Script
Since all the set up is done locally, our app server
will be on the same machine as our tsung test.
For this to work, we want to set our test script
to hit our application at localhost.
<!-- Server side setup -->
<servers>
  <server host="localhost" port="3000" type="tcp"></server>
</servers>
Here, my web app server is set up on localhost:3000.
Problem with multipart/form-data
Back when our app was simple enough, all the POST
endpoint only contains textual data.
Therefore, we can use x-www-form-urlencoded to
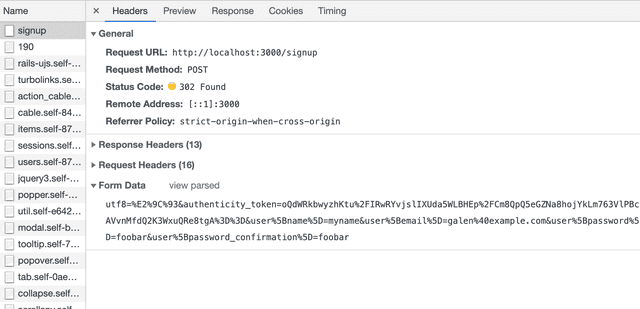
send our data. In Chrome DevTools, you can view
the raw HTTP body that is being sent to the server.
For instance,
If so, we can simply copy the content of the form data from the DevTool, and paste them into the test script in the XML.
<http url='/signup' version='1.1' contents='user%5Bname%5D=test_name&user%5Bemail%5D=test%40gmail.com&user%5Bpassword%5D=fdsafdsa&user%5Bpassword_confirmation%5D=fdsafdsa&commit=Create+my+account' method='POST'>
</http>x-www-form-urlencoded does not support
raw binary file upload. We want to use multipart/form-data
instead. When I upload a form without an image,
we can see it in the DevTool.
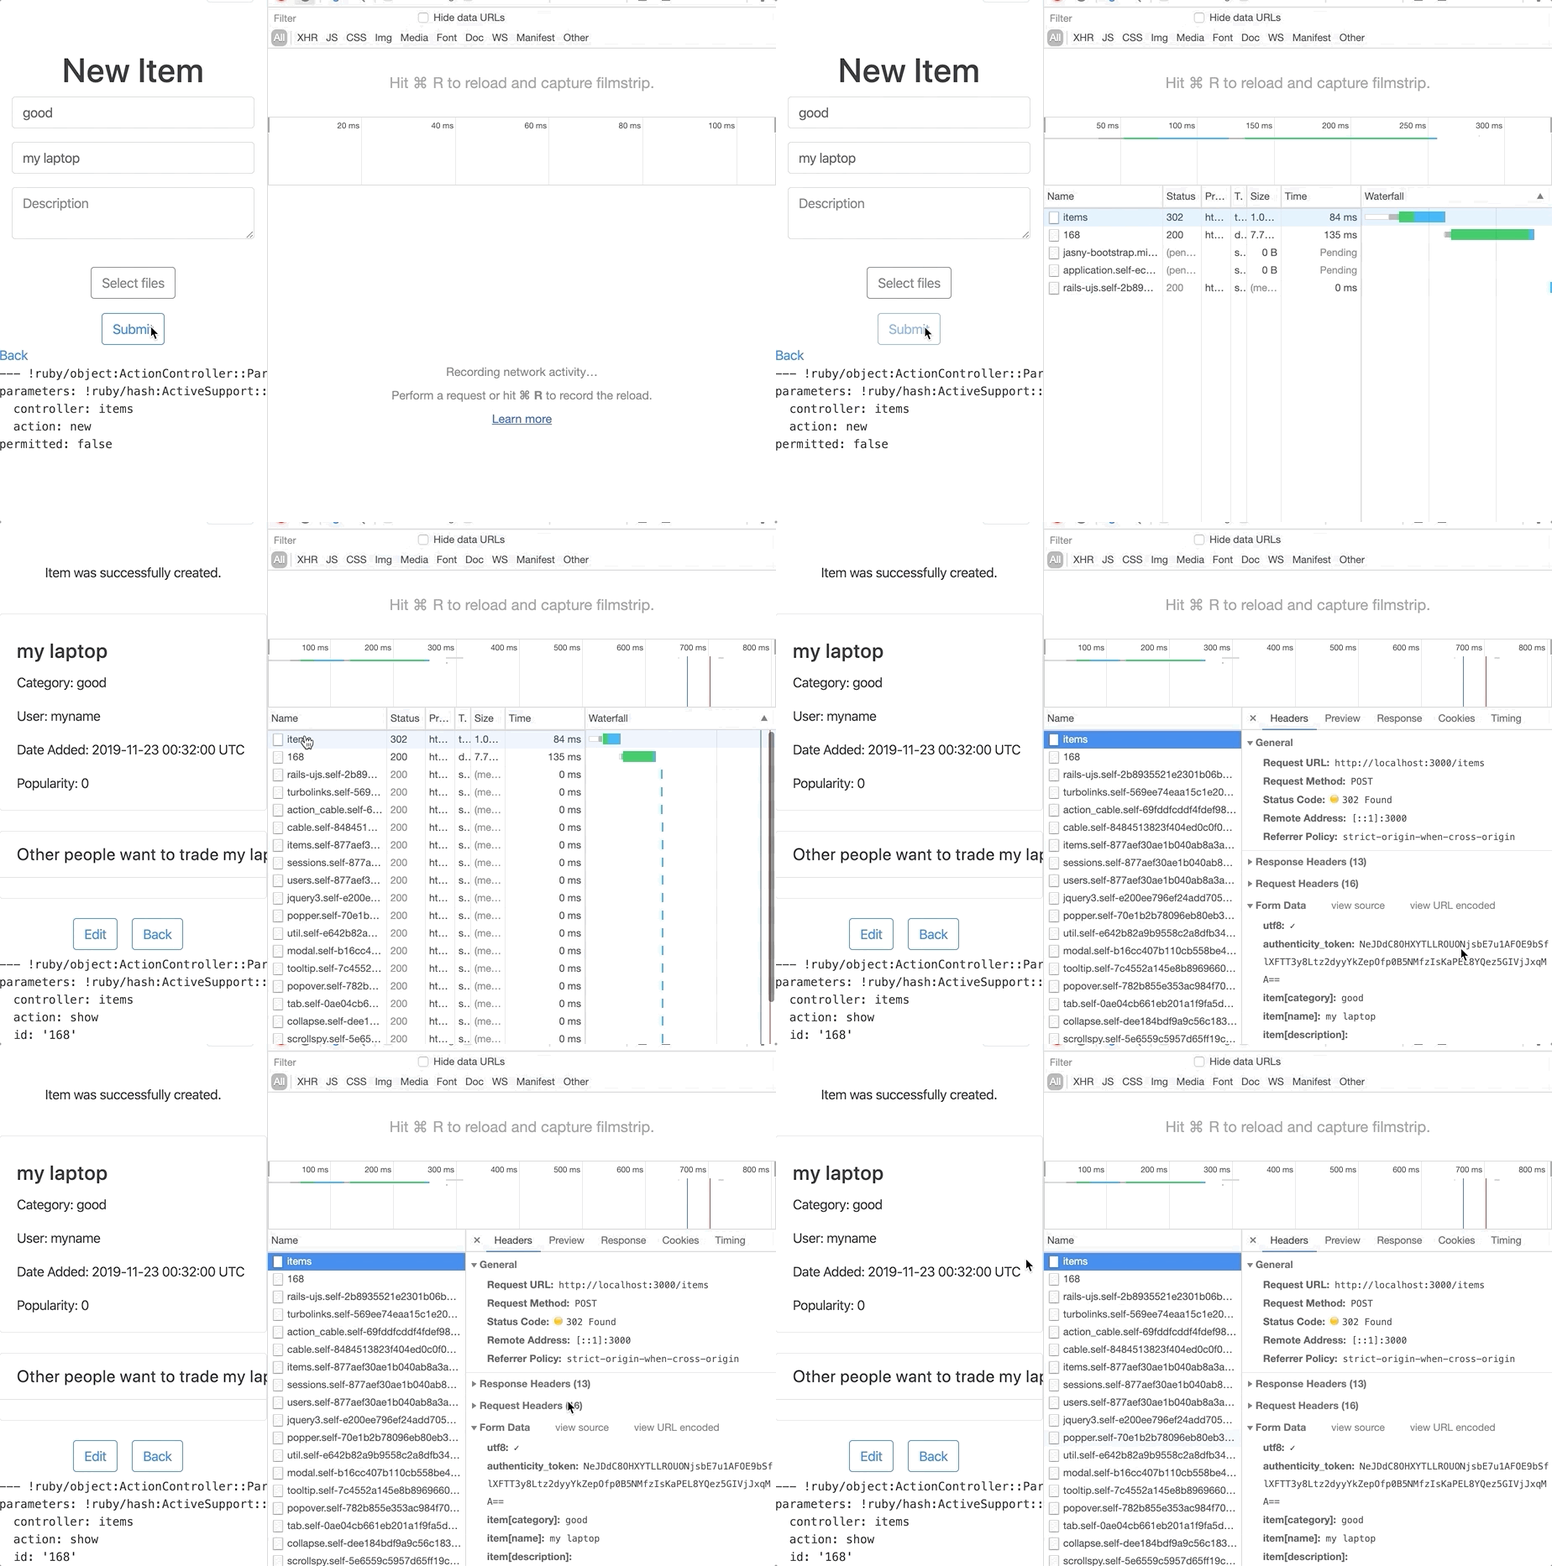
You can still copy and paste the content by clicking
on view source and put them into the XML.
However, multipart/form-data requires the body to
use CRLF line ending. Simple copy and paste might use
just LF as line ending and might not work.
However, the bigger problem is that when we select a file to upload, we cannot see the raw output from the DevTool.
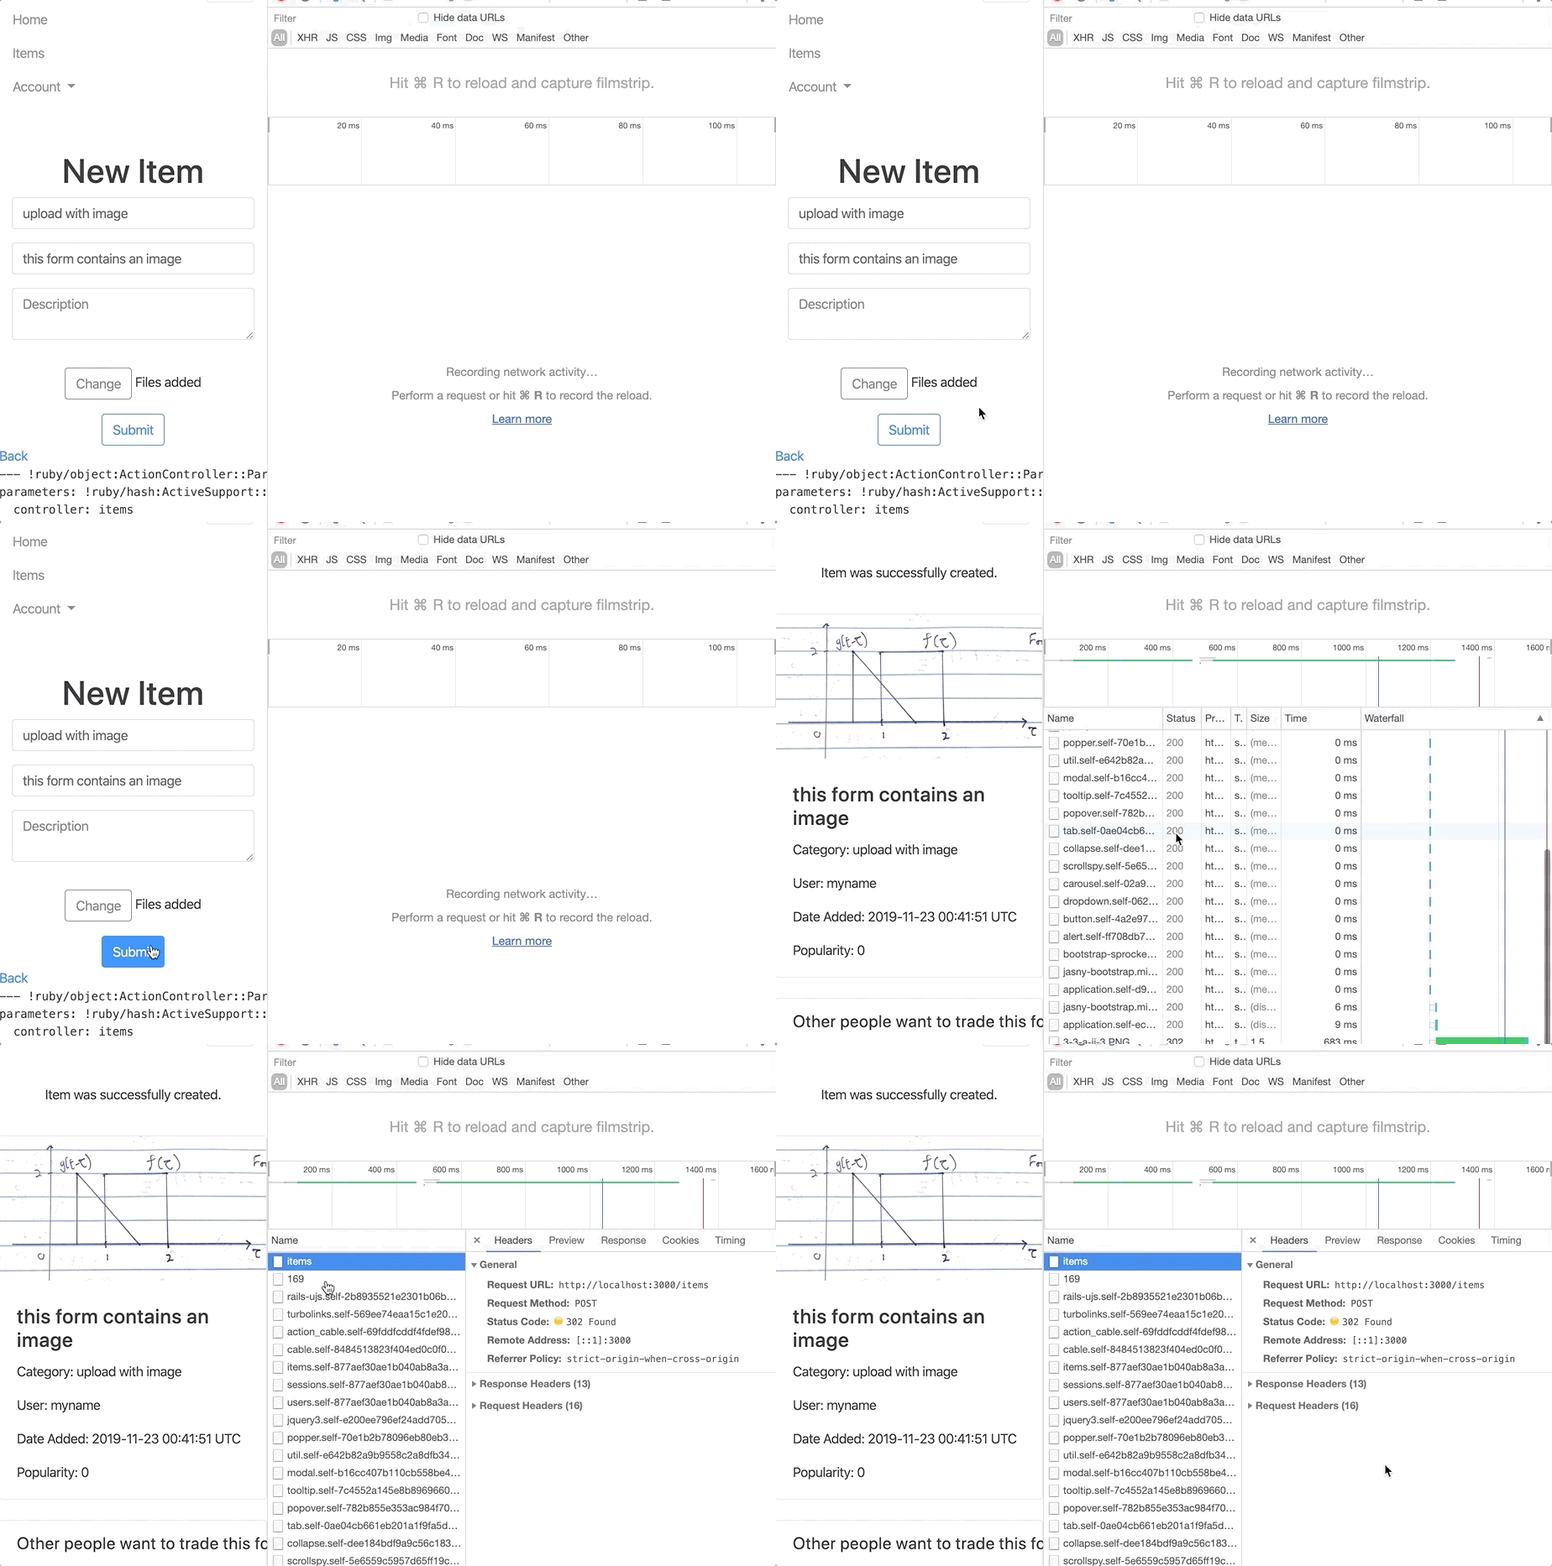
This make sense from the perspective of the user experience of Chrome DevTools. Showing the binary is going make the UI slow and displaying the binary is not useful to the users as well.
Since we cannot simply copy and paste from the DevTools, we need another solution.
Tsung Proxy Recorder
Tsung is aware that manually capturing the network
transaction and turning them into XML is a lot of
manual labor. Therefore, they provide a proxy recorder
to simplify the process called tsung-recorder.
What Is A Proxy?
Before we start using tsung-recorder, we need
to understand what a proxy is.
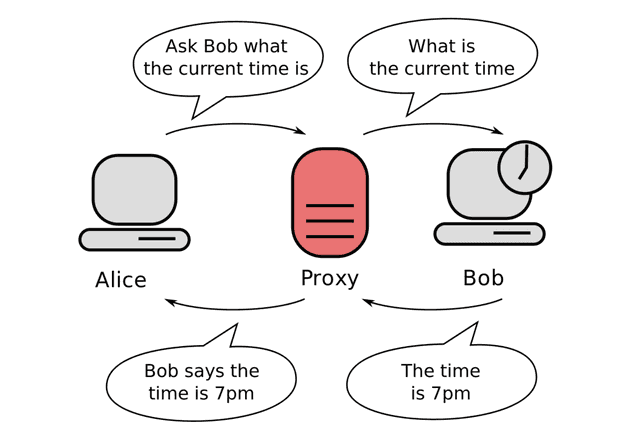
A proxy is simply a “man-in-the-middle”. If you use a proxy service, all the network traffic will be forwarded to the proxy server. The proxy server will handle all the network traffic for you and return the appropriate response.
Using Tsung Recorder
Tsung recorder is a special proxy server that captures all your network traffic and record them in the format of XML that can be executed by tsung as a test script.
To start the test script, we use
tsung-recorder startNow, a proxy server is set up and listening traffic from
the port 8090 (default).
And the recorded XML file can be found in ~/.tsung (default).
Just a side note, to shut down the proxy server and stop recording, technically you use
tsung-recorder stopHowever, on macOS, tsung-recorder for some reason cannot
see the other tsung-recorder process and shut them down.
The only way that I was able to shut them down is by
looking for the PID and use kill.
ps aux | grep tsungConfigure macOS to Use Proxy
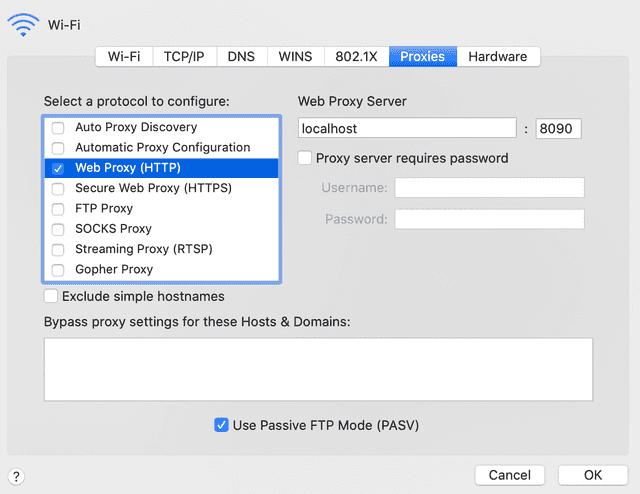
Now we know have the proxy server set up. We configure our system to forward its traffic to the proxy server. The setting of proxy can be found at System Preferences > Networks > Advanced > Proxies.
We want to configure the Web Proxy to talk to server
at localhost:8090.
Do not forget to hit apply after changing the proxy setting.
Now, if you go to the browser, and navigate to pages
that uses http. You should be able to see the traffic
being recorded in the file
~/.tsung/tsung_recorderXXXXXXXX-XXX.xml.
Note, if you navigate to pages that uses https, the
traffic cannot be recorded. Can you think of why a
simple HTTP proxy server cannot use HTTPS?
Click to see why
For HTTPS, the traffic is completely encrypted, including the header, which contains essential information for the proxy to forward the request from and to the client.
There is HTTPS proxy, but tsung-recorder is not one of them.
Now, you are very excited to hit the endpoint on
localhost:3000 in your browser, and have tsung-recorder
to record your complex multipart form POST request.
But you soon realize that it does not work.
Any traffic to localhost is not recorded by
tsung-recorder. What is the reason?
Click to see why
A proxy server might not be on the same machine
(not localhost). Then forwarding traffic to the host
localhost, which is DNS resolved on the remote machine
means we are not sending traffic to the web app on our machine.
Bypassing Chrome’s localhost No Proxy Policy
Turns out, Chrome (and Firefox) has a policy where if
the host is localhost, the browser will not use the proxy.
Instead, it directly send the request to the port without
passing it the proxy. Can you think of why?
A way for us to bypass that is to alias the address 127.0.0.1
with another domain name. We modify the /etc/hosts file.
127.0.0.1 my.fake.domain.comBy adding the line in the /etc/hosts file, we can now access
our application at my.fake.domain.com:3000.
And since we are no longer using the host name localhost to
access our web app, the traffic are being forwarded to the
proxy server (tsung recorder). Therefore, all your traffic
is now recorded!
To simulate a file upload, you simply do what your user do.
Navigate to your web app (with the fake domain), and use
the web UI to upload the file. We can than go to ~/.tsung
to see the output XML file. For a POST request with file
upload, you might find
<request>
<http url='/items' version='1.1'  contents_from_file='/Users/galenw/.tsung/tsung_recorder20191121-2355-1.bin' content_type='multipart/form-data; boundary=----WebKitFormBoundaryZePexFw6eX9E0kPZ' method='POST'>
  <http_header name='Accept' value='text/html,application/xhtml+xml,application/xml;q=0.9,image/webp,image/apng,*/*;q=0.8,application/signed-exchange;v=b3' />
  <http_header name='Accept-Encoding' value='gzip, deflate' />
  <http_header name='Accept-Language' value='en-GB,en;q=0.9,en-US;q=0.8,zh-CN;q=0.7,zh;q=0.6,zh-TW;q=0.5' />
  <http_header name='Cache-Control' value='max-age=0' /></http></request>
The most important thing to see here is the http tag.
It has attribute content_type being multipart/form-data,
and contents_from_file referencing some binary file with
the extension .bin.
If you read the binary file, you will see it is the body
of our POST request. Now, you have captured a POST request
with file upload. Then, you can use this in your test script
with no problem!
Gotchas in Test Script
Very likely that your test script uses some sort of dynamic
data, such as user id that depends on the previous request.
Then, you will use
dynamic variable substitution
to solve the issue. This is done by turning substitution
on in the request tag.
<request subst="true">However, during my testing, my test script gives error,
for reason related to memory overflow. The reason is that
Tsung is trying to go through the entire content of the
binary file to look for substitution pattern.
This requires way too much memory. To avoid that problem,
you can set subst option to ignore the body of the request.
<request subst="all_except_body">Do not forget to undo your proxy setting and remove the
alias from your /etc/hosts file after you are done!
